
Skip to content

Using the File Browser

Vault Toolbox includes a File Browser that allows you to browse, search, upload, and download files and folders in your Vault’s file staging. Additionally, the File Browser allows you to download Direct Data extracts directly instead of having to send requests to Direct Data API yourself.

This guide explains how to use the File Browser to browse and search for files, modify folder structures, upload files, and download Direct Data extracts.
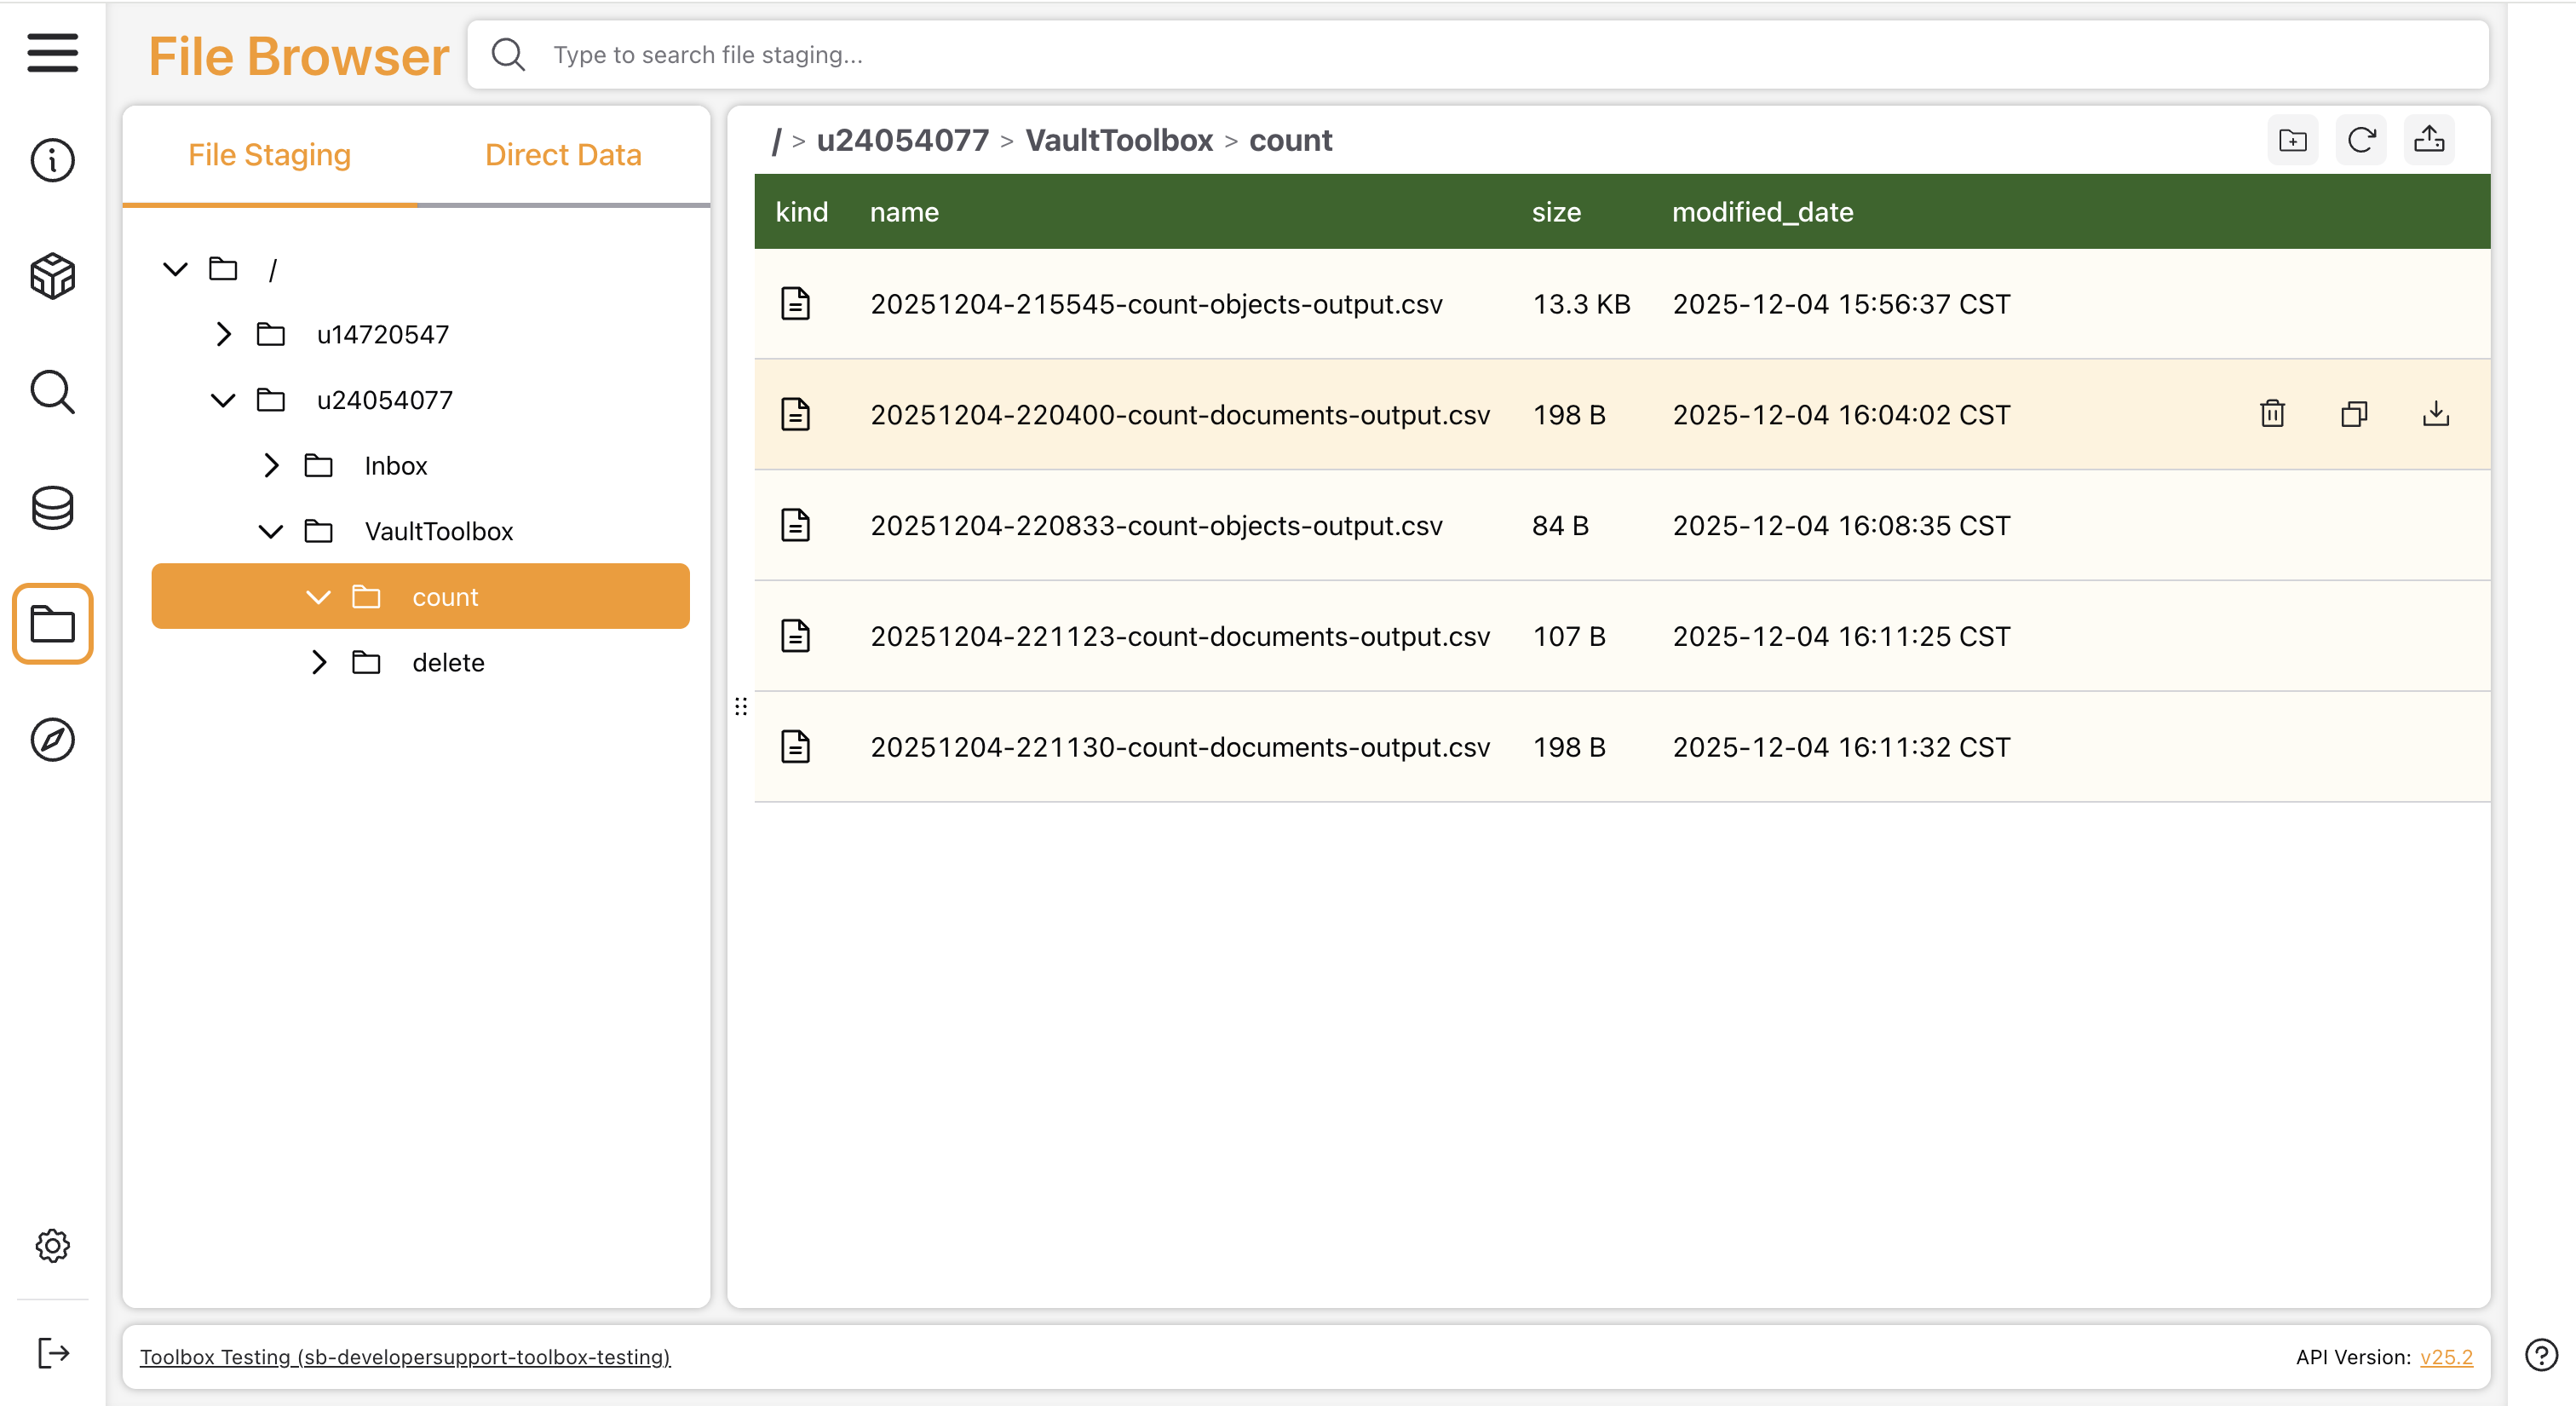
View and manage files in your Vault's file staging with the File BrowserView and manage files in your Vault's file staging with the File Browser

The File Staging panel displays the files and folders in your Vault's file staging. If the File Staging tab is not visible, you must enable it from the Settings page.

Click the icon to expand a folder. Select a folder () to view its files in the File Browser. If you hover over a file name, you have the option to Delete item (), Copy full path (), or Download file ().

Click Reload current directory () to refresh the File Browser to reflect changes.

When you type a term into the search bar, Vault Toolbox returns matches for both file and folder names in your file staging, and includes partial word matches. For example, search results for "bio" might contain "biological", "antibiotic", and "tibiofibular".

To export a folder's listing to CSV, hover over the folder in the File Staging panel and click Export this folder to CSV (). Vault Toolbox downloads a file named file-staging-listing-<folder>.csv containing the kind, name, path, size, and modified date of each item in that folder and all subfolders.

To upload a file, navigate to the folder in which to place the file and click Upload file to current directory (). The maximum file size is 500GB. To create a new folder to upload files to, click Create folder at current location ().

If you upload a file that already exists in the current directory, Vault Toolbox displays a warning that compares the size and modified date of the existing file with the file you are uploading. Click Overwrite to replace the existing file, or Cancel to keep the existing file and cancel the upload.

To upload an entire folder and preserve its structure in your Vault's file staging, click Upload folder to current directory () and select a folder from your local file system. Vault Toolbox creates the folder structure in your Vault first, then uploads each file inside it. If a file fails to upload, Vault Toolbox continues with the remaining files and lists the failures in the summary.

Before the upload begins, Vault Toolbox displays a confirmation dialog that reports how many files will be uploaded and lets you choose how to handle files that already exist at their destination:

  • Click Overwrite existing to replace existing files with the ones you are uploading.
  • Click Skip existing to keep existing files and upload only the new ones.
  • Click Cancel to stop the upload.

While the upload is in progress, dialog displays a progress bar and running counts of files skipped or failed. Click Cancel during the upload to stop it.

Once the upload finishes, the dialog displays a summary, including a list of any files that failed and the reason.

To download a file, hover over the file's row in the File Browser and click Download file (). You can also click Copy full path () to copy the path to the file for use with the File Staging API or other tools.

The File Browser is also capable of downloading extracts generated by Direct Data API, handling and merging the potential multiple file parts. Direct Data extracts contain the data for Vault components, such as Vault objects, documents, and picklists.

From the Direct Data tab of the File Browser, you can also use the search bar to return matches for Direct Data extract file names.
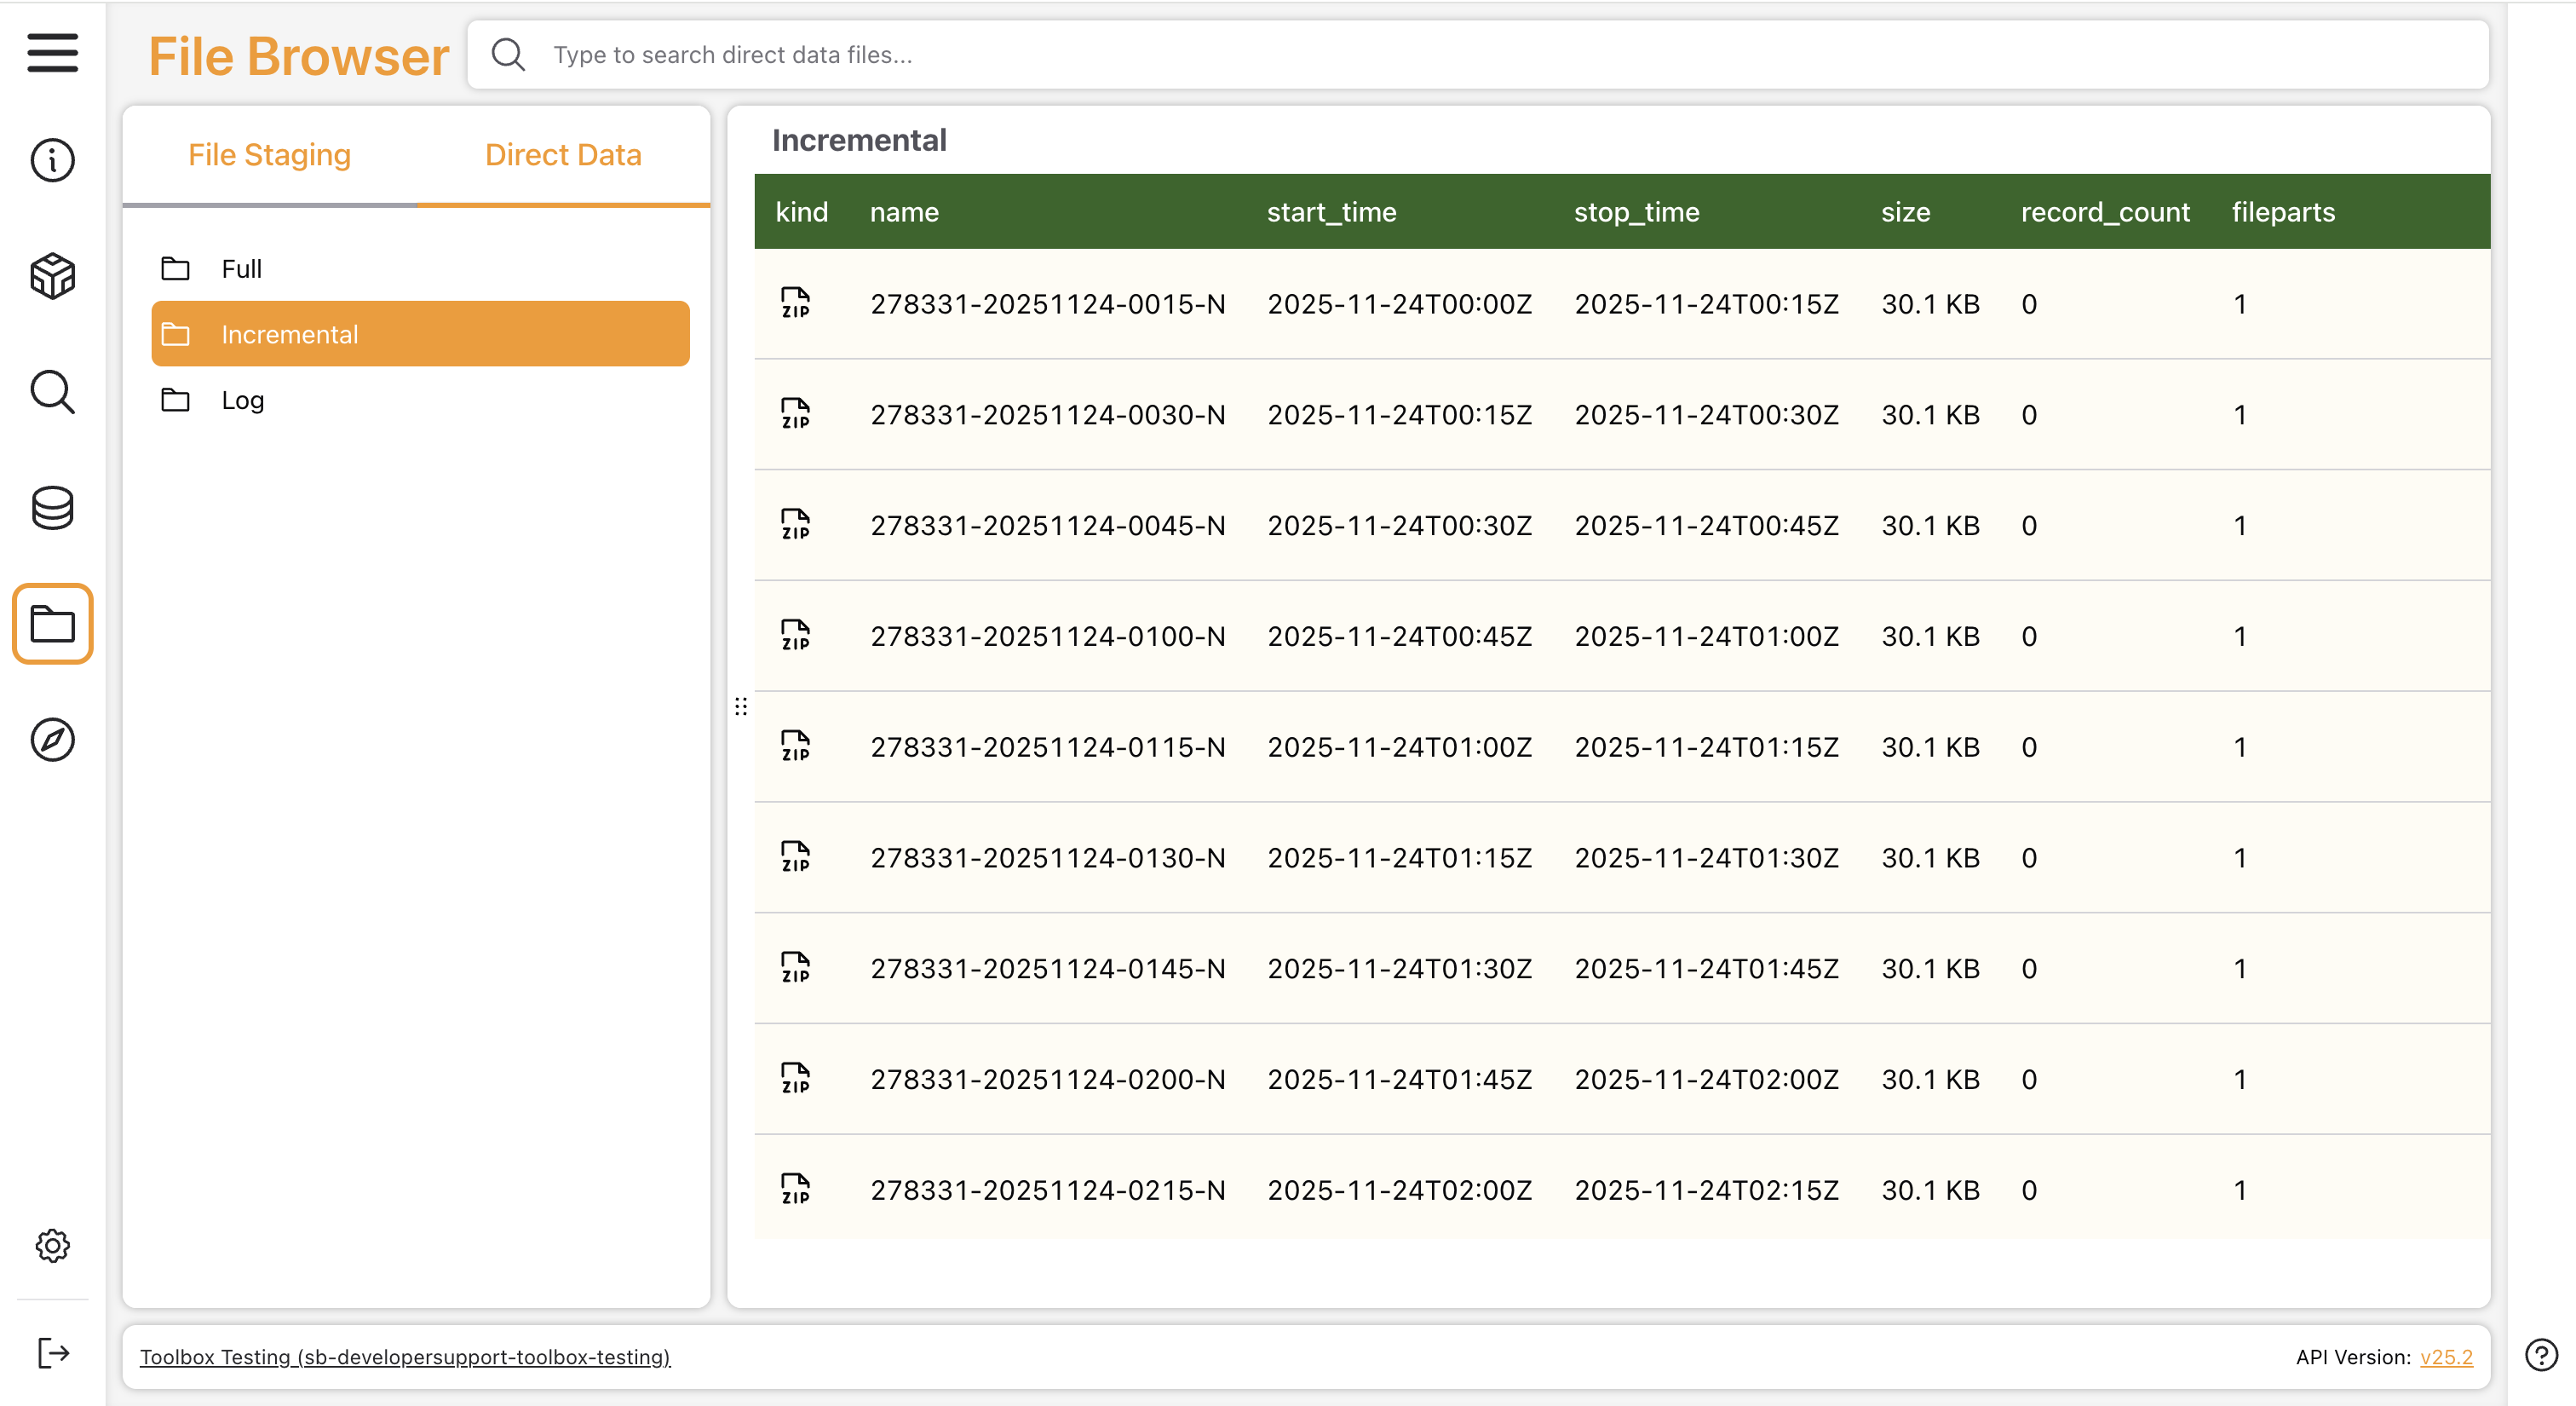
Vault Toolbox Direct Data files in File BrowserVault Toolbox Direct Data files in File Browser

To download a Direct Data extract:

  1. From the File Browser page, select the Direct Data tab. If this tab is not visible, you must enable it from the Settings page.
  2. Select the file type: Full, Incremental, or Log.
  3. Hover over the extract file’s row in the File Browser and click Download file ().

See Extract Naming and Attributes to learn more about how to interpret downloaded Direct Data extracts.